Showing posts with label SUP. Show all posts

Wednesday, March 23, 2016

How to Stand Up Paddle with Verena Mei

Learn how to SUP with Verena Mei and Blue Planet Surf.  
Verena is a professional race car driver. She grew up in Hawaii and recently moved back to Oahu.  She got into Stand Up Paddleboarding and has been a great customer and supporter of Blue Planet Surf Shop. In this series she is getting tips on safety, technique, board handling and more from Blue Planet Surf founder Robert Stehlik.  We will post regularly new videos on our blueplanetsurf youtube channel and plan to release the parts of this series in the Spring of 2016. For new videos please check back here and subscribe to our youtube channel.  
Watch the first video in the series:
How to Stand Up Paddle Board with Verena Mei, Part 1: Safety


SUP is a great, fun, health and safe sport if practiced with some common sense.
Basic points covered in this video are:
1) Be aware of conditions. Light wind and protected water are the best conditions for beginner and learning quickly.  Light winds are fine but the chop created by the wind will make balancing more difficult and you should always make sure to paddle into the wind first to make sure you can get back to where you started.  Don't go out if the wind is strong, offshore winds (blowing you away from the shore) can be very dangerous as they can carry you out to sea and usually get stronger the farther out you get.
2) Always wear a leash.  In Hawaii we are not required to wear a personal floatation device when Stand Up Paddle boarding but you should always wear a good leash and make sure it is attached securely, that way your boards is always attached to you and acts as your floatation device.
3) Know how to swim.  This should be self explanatory, but before you learn how to SUP, you should learn how to swim first.  The rule of thumb is: don't go out further from shore than you could swim back on your own power.
This is the second video in this series: board handling and gear
In this video you learn how to protect your board from heat and fin damage, how to safely lift up and carry your board and some things to consider when choosing your first board.  At Blue Planet we always recommend trying several SUP's before choosing one as nothing beats trying a board to get an idea of whether it will work for you or not.  Balancing should be challenging at first, as your balance quickly improves.  We often talk to customers that bought their first board without trying it first and then finding out that it is just not a good board for their needs.  Let's face it, it does not matter how cheap a board is or how great the deal seems to be, if you don't enjoy using the board and it sits around collecting dust, it's a waste of money.  We want you to get out on the water and enjoy your board, so we want to make sure you get one that is right for you.  
Keep watching the playlist to see all 11 episodes on "How to Stand Up Paddle with Verena Mei"


Tuesday, February 2, 2016

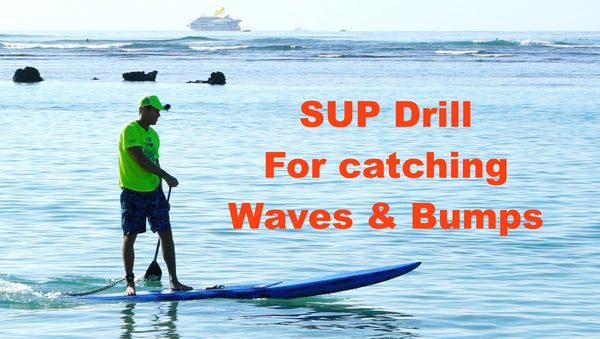
Stand Up Paddle Technique Drill: Catching Bumps and Waves on a SUP

Re-posted from this Blue Planet Blog posting:
http://blueplanetsurf.com/blogs/news/75266693-sup-tips-catching-waves-and-bumps-flatwater-drills-to-help-you-get-ready-for-open-ocean-stand-up-paddle-boarding

If you are new to downwind stand up paddle boarding, and want to get ready to do some open ocean downwinders, these are some tips and drills you can practice in flat water to help you get ready for riding bumps on a SUP.   Check the bottom of this page for information on coached downwinders. 
This post is focused on downwinders and catching/ gliding on bumps, but this drill is also helpful for catching breaking waves if you want to learn to stand up paddle surf.
In this first video I'm showing how to take a few quick accelerating strokes and then pause, glide and skim/ brace the paddle to keep you stable and balanced while gliding.  If you are doing a downwinder in light winds, this is what you will end up doing:  a few quick accelerating strokes, then pause and glide while you are getting pulled along by the bump in front of you.  In light wind you usually won't have to move the feet back, you can keep the parallel stance close to the center of the board.  It's good to practice this drill in flat water to break the habit of paddling with long, powerful strokes at a steady pace.  Downwinders are about quick sprints and glides, so you have to learn to break up your pace.   The first step is to practice taking 3,4, or 5 quick strokes and then let the board glide for about the same amount of time, so you are only paddling for about half the time.  Don't worry about moving your feet at first and just get into a good rhythm of accelerating and then gliding and skimming your paddle for balance.  Try to skim it as far out to the side as possible with the paddle at a low angle to the water for side to side stability and behind you for front to back stability.  Just skim the paddle lightly over the surface, you don't want to break, just keep the paddle very close to the water or skim very lightly over the surface.  While skimming the paddle acts as a third leg which will give you more control and will allow you to feel more comfortable in rougher conditions.  If you do loose your balance you can lean on the paddle and push your center of gravity back over the center of the board.

This next video shows how to start in "first gear" by taking quick, short strokes for powerful acceleration.  You want to focus on keeping your stroke in front of your feet and using quick bursts of power to accelerate.  Practice this in flat water as well as you will not have time to focus on this when conditions get rough. 
When the wind is stronger and the bumps get steeper, you will also have to move your weight back on the board to keep the nose from piercing and to allow your board to release and accelerate by planing on top of the water surface and to reduce the amount of wetted surface.  So, once you are good at stroking quickly to accelerate and then gliding while skimming the paddle, the next step is to also practice moving your feet back as you stop paddling and glide.  As the board slows down and the tail starts to sink, you then have to move your weight back forward close to center quickly and take some more quick acceleration strokes.  The video below has some helpful tips for moving your feet around on the board without rocking the board and loosing your balance:
 If you do this for a while, you will notice that these quick sprints followed by pauses of gliding will actually be very hard work and your heart rate will go up to a higher rate than when paddling at a steady pace.  I find that my heart rate goes up significantly higher in downwinders than when flatwater paddling which is why it is so important to relax and rest while you get a free ride when gliding on and connecting bumps.  If you don't rest it is hard to catch the next bump.  There is a misconception that when the wind blows hard you hardly have to paddle anymore.  The reality is that you have to accelerate more quickly and paddle even harder to catch the faster moving bumps on the really windy days if you want to keep up with the really fast guys.  The goal is to move as close to the speed of the bumps as possible and the stronger the wind is and the longer the fetch (the distance the wind has to create bumps), the faster you have to move to catch them.
The next video covers the five most common mistakes made by first timers on downwind runs and will be helpful to watch as well if you want to improve your downwind stand up paddle technique.
Thank you for watching!
Aloha,
Robert Stehlik
Copyright Blue Planet Surf 2016,  you are welcome to re-post or share this content but please credit Blue Planet Surf and put a link to www.blueplanetsurf.com
Resources mentioned in the videos:
For more information on our weekly SUP training group, please visit:
http://zenwaterman.blogspot.com/2012/10/weekly-time-trials-in-hawaii-kai-video.html
For information on SUP lessons and downwind coaching by Robert Stehlik, please visit: http://blueplanetsurf.com/collections/lessons
For information on downwind coaching with Jeff Chang/ Wet Feet, please visit: http://www.wetfeethawaii.com/pages/lessons-tours.html
For information on coached downwinders with Jeremy Riggs on Maui: http://paddlewithriggs.com
Safety first:  Downwinders can be dangerous.  Always go with a partner or group and if you are going for the first time, go with an experienced paddler or coach.  Have a plan and set up meeting places if you loose sight of each other, with can happen quickly in open ocean conditions.  Take a cellphone in a waterproof case and/ or a EPIRB.  Always wear a leash and make sure all your equipment is in good condition.
Equipment used in the videos:
Rasta downwind board: 14' x 28" 2016 Bump Rider: http://blueplanetsurf.com/products/140-x-28-bump-rider-2016


Sunday, February 1, 2015

Dealing with a Stand Up Paddle related shoulder injury

Stand Up Paddling can be hard on the shoulders, here is a video with some tips for dealing with an injury:


In these two videos I talk about a shoulder injury I have been dealing with for over a year and what worked for me.  I hope this helps others. 
I will not repeat everything in the videos but some things not mentioned are the many things I tried to treat the injury, including: rest, icing, heat, stretching, chiropractic adjustments, acupuncture, massage, taping the shoulder, pain relieving gels (Arnica gel) and rubs, not sleeping on the affected shoulder, and more.
While all these helped, I feel like the main key to recovery are the PT rotator cuff exercises shown in the video.  I'm not saying not to try everything else, especially to relieve pain and discomfort but in my experience, the exercises were the most helpful to recover.  
My doctor thinks the pain is caused by Bursitis, as well as possible damage to the rotator cuff muscles and tendonitis.  This link has good information on Bursitis and how to treat it, if you are interested in reading more about it:
My doctor recommended trying a Cortisone injection if the PT did not help but since my injury has improved greatly since starting the exercises I have been able to avoid and injection.  So, if you think you may have a similar injury caused by paddling, or if you want to prevent this type of injury, I highly recommend making these rotator cuff muscle strengthening exercises part of your training regimen.
Please note that I am not a doctor or expert on this subject.  Since your injury may be different than mine, I recommend seeing a doctor and/or physical therapist.  Don't do any of these exercises if they are painful and make sure to keep good posture and form when doing the exercises.  When I was doing research on this subject I found that these physical therapy exercises were not posted online, it is how the PT's make a living after all, which is why I decided to make this video, I hope it helps others treat and prevent injury sooner. 
I'm happy to answer any questions, feel free to post a comment.
Aloha,
Robert Stehlik
www.blueplanetsurf.com

Here is another video that explains the importance of strengthening the rotator cuff muscles and I totally agree:

Stand Up Paddle board volume explained- ways to determine the proper board volume


We are often asked: "What SUP board volume is best for me?"
The short answer is: "It depends.  For beginners we recommend a volume of about twice your body weight."
Here is a longer explanation of our board volume recommendations:
First of all, you need to know your body weight into kg.
To convert from pounds to kg divide your weight by 2.2 (1 kg = 2.2 lbs)
Using myself as an example:  my weight is 195 lb. divided by 2.2= approx. 88 kg.
The metric system makes it easy to calculate lift created by volume as one kg is equals to the weight of one liter of water by definition (note that salt water is slightly denser so the same board will float slightly better in the ocean than in freshwater).   Interestingly most board dimensions are quoted in feet and inches but volume is always quoted in metric liters for this reason.
Basically: one liter of volume displaces one liter of water and therefore creates one kg of lift, so one liter of board volume will float one kg of weight.
For beginners, we recommend body weight in kg= liters x 2 (approximately) or about 176 liters volume for my weight of 88 kg.  This means that when I stand on the board, it will be pushed about half way under water to displace enough water to float my body weight plus equipment weight.   Please note that more volume will not necessarily make the board more stable.  Side to side stability is a result of the width of the board and the thickness of the rails and to a lesser degree the length of the board.  A thicker board can actually be less stable as the feet are higher off the water, raising the center of gravity.
For racing and touring you can go with a higher volume as thicker, high volume rails can add secondary stability to a narrower hull that has less resistance than a wider board.  In downwinders especially, high volume in the front of the board works well to keep the nose from plowing deep into the trough.
If high performance SUP surfing is your goal, as you improve you can gradually lower the volume of the boards you use since a lower volume board will generally surf better but will also be much harder to balance on and control, making low volume,high performance boards very difficult to learn on.  
Expert SUP surfers can use a board volume as low as their body weight plus board, paddle, clothing and gear weight plus a few liters extra, or about 100 Liters volume for my body weight.  At this volume the board will barely float when not moving.  Some pros even use boards that don't float them when standing still, they need the dynamic lift created from moving through the water to keep them afloat, the board will sink if they stop paddling, with the board volume in liters slightly less than their body weight plus board and equipment weight in kg.  
Once again:  The body weight times two is only a rough guide to recommended volume as the width and volume distribution of the board has a bigger impact on how stable the board will be.  Although we recommend buying a board that is challenging to balance on at first since your balance will quickly improve with practice, don't make the mistake of buying  a board that is too small for your skill level as that can be very frustrating.  The point is to have FUN!
SUP board volume
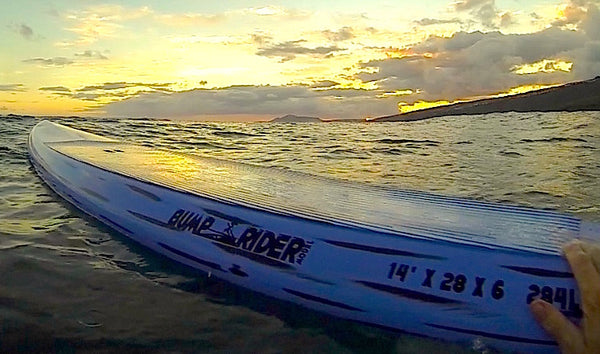
The 14' x 28" x 6" Bump Rider is a downwind board with 284 Liters of volume

Aloha, Robert Stehlik
www.blueplanetsurf.com

Thursday, September 25, 2014

Surfing on SUP raceboards is FUN!

Jeff Chang surfing his 14' Wet Feet Raceboard

Surfing on raceboards is a lot of fun and a great skill to practice if you want to get faster on downwind runs, since it's all about surfing the bumps. Surfing these big, long boards also allows you to catch and surf waves that others can't, which opens up all kinds of uncrowded spots and smaller waves that are barely breaking that you can catch from way outside,surf and ENJOY without a crowd.

These two videos are from our weekly SUP training group, in the first one we go over some tips on how to surf waves on long raceboards (sorry, the sound is not the best as the microphone was picking up the wind noise). The second video has action on the water with a voiceover going over some of the tips. We hope you enjoy the footage. If you like our videos, please subscribe to the blueplanetsurf youtube channel!

Part 1: On land coaching:


Part 2: On the Water- Surfing SUP race boards:


Aloha, Robert Stehlik


Saturday, September 20, 2014

SUP tips for beginners: Videos that will help you avoid the most common mistakes

Between our Blue Planet SUP clinics and private and group lessons, we have helped hundreds of beginners learn how to SUP (stand up paddle).  The best way to learn the basics and start having fun on the water with minimum frustration is by taking a lesson with a well qualified instructor that can help you learn proper technique from the start.  If you don't have the opportunity to do that, the next best thing is to read up and watch instructional videos that will help you avoid common mistakes and don't let bad habits become engrained.  Remember to make sure to learn the basics in calm, protected water before attempting to SUP in the surf, even if you are an experienced surfer, you are learning a new sport and have to learn the basics of using the paddle and balancing first.

One of our most popular videos on the blueplanetsurf youtube channel (please subscribe to our youtube channel to see our latest videos) is titled Introduction to Stand Up Paddling.  
We recently added three more videos to our channel to help beginners get started in this great sport.


The first video is titled: SUP tips: Common beginner mistakes
This video goes over some of the common mistakes we often see when people paddle for the first time, including: getting on the board before it is in deep enough water, trying to stand on the board before kneeling first, going with the wind instead of into the wind, holding the paddle straight to go forward, holding the paddle backwards, hands too close together on shaft, not standing in the middle of the board. 


The second video is titled: SUP Balance Tips for Beginners
This video gives some pointers to beginners that are struggling to stand up and balance on the board (it's not as easy as it looks!).  Some of the points covered in this video: getting on the right equipment, centering weight over middle of board, getting the board moving before standing up, different ways of getting from kneeling to standing, using the paddle to brace and lowering center of gravity to help balance, balancing on smaller boards, moving around on the board, getting upright and looking forward, not down.


The third video is titled: SUP tips for beginners: Stoke Technique Drills
This video shows how to practice your stroke while standing in knee deep water and goes over getting good catch with the blade, getting good reach and ending stroke by the feet, feathering the blade at the release and during the recovery as well as using torso rotation to make your stroke more powerful.


This fourth video shows how to fall in safely, flip the board over and get back on easily:


Playlist:  Watch our Introduction to SUP- tips for beginner Stand Up Paddlers playlist to watch all the videos we have put together to help you get started.  


For more videos, including more advanced technique tips for intermediate and advanced paddlers, please also check to our playlist titled SUP technique videos (some of the videos are in both playlists).


Thanks for watching and remember to have FUN!

Aloha


Stand up paddle technique tips for beginners
Falling in is part of learning and part of the fun.  This is the right way to fall if you do fall in: hold paddle away from body, fall into water, not onto the board, fall flat on the water surface so you don't go deep in case it's shallow.  


Aloha, 
Robert Stehlik

Friday, October 4, 2013

Information on Coached Downwind Runs with Blue Planet

If you are interested in learning how to do downwinders on Oahu or want to improve your bump riding skills and timing to go faster with less effort, please consider a private downwind coaching session on Oahu's south shore with Robert Stehlik.  The most common south shore run for experienced paddlers is the Hawaii Kai to Kaimana Beach (Waikiki) run.

For beginner downwind paddlers, the Hawaii Kai to Kahala run is better suited for learning downwind paddling as going around Black Point and Diamond Head can be very challenging when you are starting out.
Hawaii Kai to Kahala downwinder GPS track, approx. 5 miles

For the coached Kahala run, we usually meet in Kahala at the Waialae beach park and take a look at the the reef to go over where the channel is and what to look for when coming in.  Coming in through the reef at Kahala is one of the most challenging parts of the run and can be dangerous, especially on a low tide, so please don't attempt this by yourself without someone that knows where to go.
We leave one car at the finish in Kahala then drive to Hawaii Kai where the downwind run starts.  We then spend some time going over some downwind basics, tips, drills, equipment, and stretching before going into the water.  Below is a map of the meeting place in Kahala and a google map that shows the run.  You can zoom into the meeting place called Waialae Beach Park, just before the Kahala Mandarin Hotel.
Waialae Beach Park, the meeting place for the Hawaii Kai to Kahala Run


View Kahala beach downwind coaching meet here in a larger map

Below is a video of a recent coached downwind run:


If you are planning to do a coached downwinder, click the link and watch the videos with downwind tips for the Hawaii Kai to Kaimana run:
http://www.supthemag.com/videos/downwind-coaching-while-downwinding/

For pricing and to book a coached downwinder, please call Blue Planet Surf Shop at 808 596 7755 or visit:

http://blueplanetsurf.com/products/downwind-coaching-hawaii-kai-to-kahala-downwinder

A  video of your downwinder is available on request (please ask to have it filmed at the time of booking).  


Posing after a successful Kahala run with our 14' Blue Planet Bump Rider boards


For referrals from past participants, please check some of the reviews on Tripadvisor:


Aloha, Robert Stehlik

Wednesday, March 27, 2013

Paddling around Oahu on a SUP- 124 miles in 3 days- by Robert Stehlik


Ok, we did not do it on consecutive days and it was not a circumnavigation but Jeff Chang and I paddled around the entire coastline of Oahu, 124 miles total in 3 days, here is the story.

Originally we had talked about circumnavigating Oahu in 3 consecutive days,  we were waiting for good conditions (light wind) to be able to paddle all the way around Oahu.  Unfortunately it is very rare for the winds to shut off for three days in a row and for us to be able to make time to do it.  
So, this mission started as just a long day of paddling, we wanted to see how far we could paddle in one day and how we would feel afterwards.  After Stand Up Paddling all day for 47 miles, we decided that we would try to paddle around the island in three days, just not consecutive.  We would wait for good conditions and choose a day when we would both be able to go.

Jeff Chang was training for the OC1 Molokai race so he paddled on his outrigger while I was using an 18' Ohana SUP board that Jared Vargas left here when he moved back to California.  This board is not very good for downwinders and quite tippy but it's fast and smooth in calmer waters, one of the fastest SUP boards in flat water I ever used, actually.  We launched at Pinky's Restaurant in Kailua before sunrise and started paddling towards the Mokulua Islands.  The wind was light and the water was fairly calm until we got closer to Makapuu, where the water was rough and choppy, as usual, and I had to paddle on my knees around Makapuu point.  

Here are some pictures and GPS tracks of the three day journey:
Sun rising behind the Mokulua Islands outside of Lanikai
Stand Up Paddle adventure
Day one: 47 miles from Kailua to Ko Olina


Day 2: 42.6 miles- Kailua to Haleiwa


Our launch area on day 2 was where President Obama comes for his Christmas vacation, you can see the Mokulua Islands in the distance before the sunrise.


The point at the Kaneohe Marine Coprs base reminded me of Ireland for some reason

Paddling along the Windward coast, the straight line took us pretty far out.
Finally approaching Turtle Bay after paddling almost 30 miles. 
Re-fuleing stop  at the Turtle Bay resort 

Day 3: 35 miles- Haleiwa to Ko Olina

Launching in front of Surf 'N Sea on our third day
Launching in Haleiwa


There were some big waves rolling in at Avalanches

The channel marker outside Haleiwa
Stand Up Paddle technique
An efficient stroke is key when paddling for 8 hours+ 

Coming around Ka'ena Point

Getting closer to our final destination, Ko Olina


A pod of dolphins passes directly in front of me outside Mokuleia


Coming around Ka'ena Point to the Westside was spectacular


We saw lots of sea creatures, including whales, sharks, dolphins and turtles.  A huge whale surfaced about 20 feet away from me, which freaked me out.
GPS summary of the three days of paddling
Day 3: Haleiwa to Ko Olina


Aloha, Robert Stehlik